Installing and Basic Usage
To download the latest version of rite, head over to the releases page.
-
If you are a Windows user, download the
.msifile. -
If you are a macOS user, download the
.dmgfile. -
If you are a Debian/Ubuntu Linux user, download the
.debfile.
Double-click the downloaded file and install it as usual.
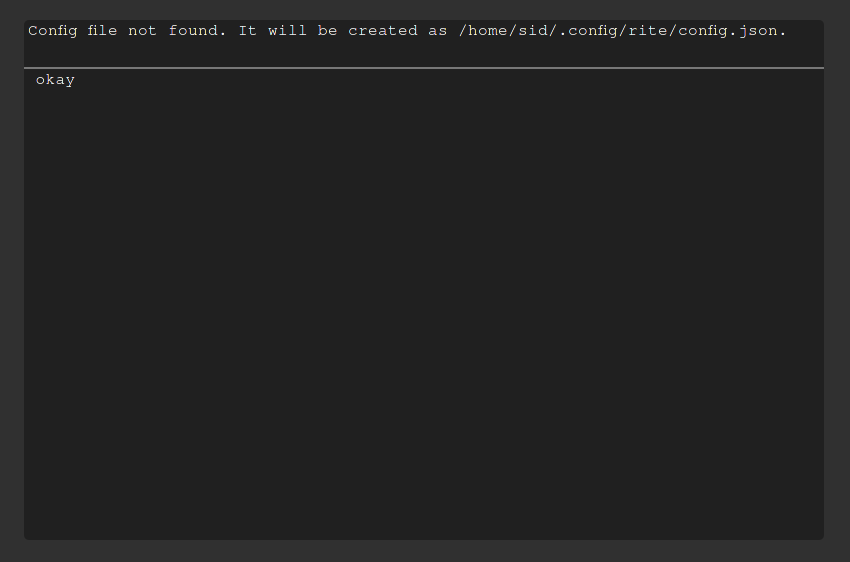
When you open rite for the first time, you will be greeted by a screen informing you of the location of the new config file.
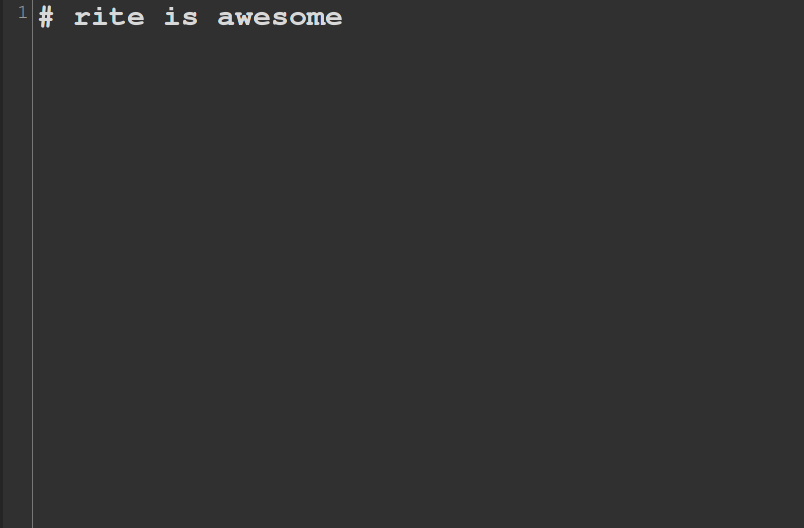
You can write Markdown in the blank editor window. Try making a heading! You can use arrows to navigate, and the following shortcuts for common operations:
(Note: On macOS, you can substitute Ctrl with Command and Alt with Option.)
- Ctrl-S Save the current file.
- Ctrl-O Open a file from your local disk.
- Ctrl-Alt-P Open the command palette.
- Ctrl-Alt-FToggle focus mode on or off.
- Ctrl-I Make the currently selected text italic.
- Ctrl-B Make the currently selected text bold.
- Ctrl-Alt-D Make the currently selected text struck through.
- Ctrl-Alt-1 Make the current line a Heading 1 (the largest heading size).
- Ctrl-Alt-2 Make the current line a Heading 2.
- Ctrl-Alt-3 Make the current line a Heading 3.
- Ctrl-Alt-4 Make the current line a Heading 4.
- Ctrl-Alt-5 Make the current line a Heading 5.
- Ctrl-Alt-6 Make the current line a Heading 6 (the smallest heading size).
- Ctrl-Shift-S Save the current file under a new name.
- Ctrl-N Create a new, blank file.
- Ctrl-F Find text
- Ctrl-H Replace
- Ctrl-Shift-H Replace all
- F1 View help
Note that you can access this list at any time by using the view_keybinds command from the
Command Palette at any time.
Experiment with writing markdown. When you're done, it's time to save your work. Press Ctrl-Alt-P (Cmd+Option+P on Macs) to bring up the command palette. Type "save" or use the arrow keys to highlight "save", then press Enter.
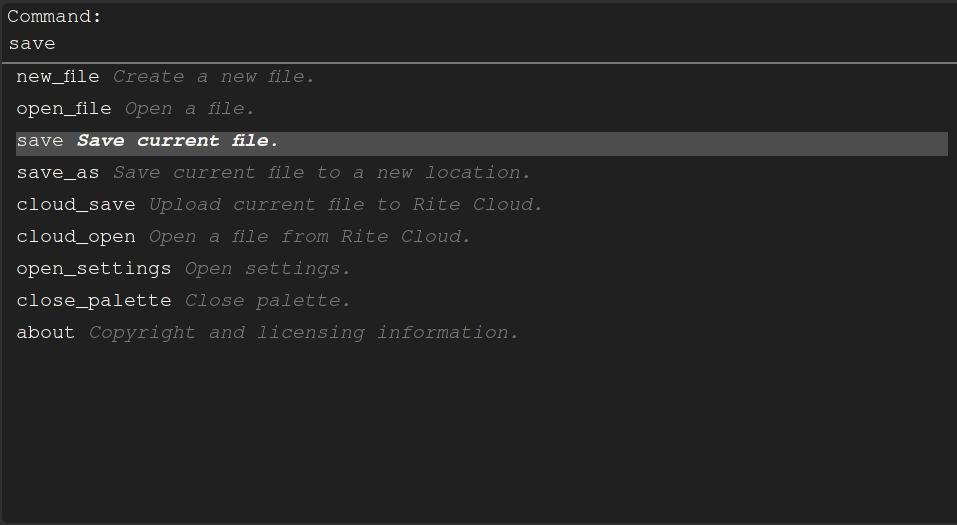
You'll exclusively use the palette to interact with Rite. You can open files, create new files, save and rename files, change settings, and use cloud functionality from here.
With this, you now have an understanding of how to use the Rite editor to edit and view markdown files.
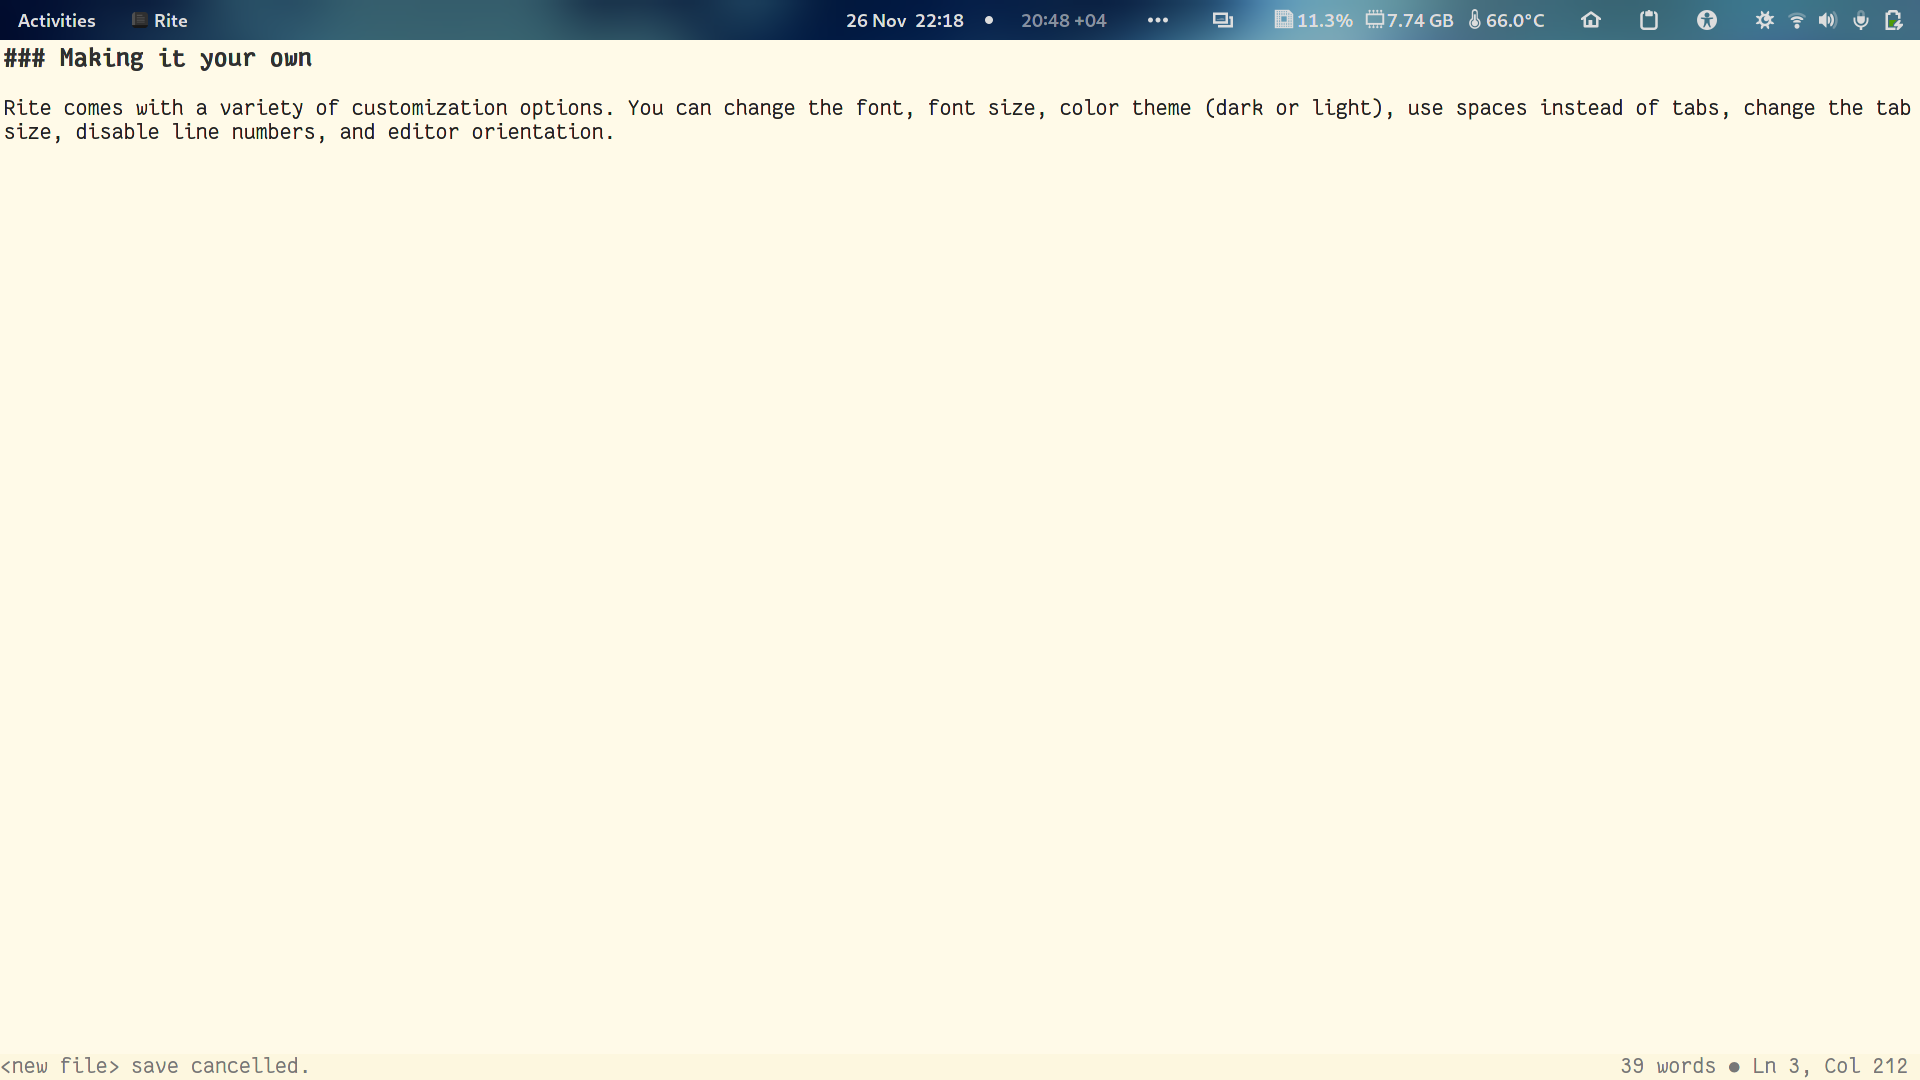
Making it your own
Rite comes with a variety of customization options. You can change the font, font size, color theme (dark or light), use spaces instead of tabs, change the tab size, disable line numbers, and editor orientation.
To change these settings, use the open_settings command in the command palette. This opens a view where you can edit the settings. When done, select "Save settings and exit" to apply your changes.
Focus mode
Focus mode is a rite feature that enables maximum focus by eliminating UI clutter and even most of your own document. It darkens and blurs all parts of the editor except the line you are currently typing. To review a line, simply hover your mouse over it to unblur it.
Advanced customization options
You can also change the default keyboard shortcuts and colors by editing the rite config file. Although this is moderately difficult, you are encouraged to try hacking the editor and truly making it your own!
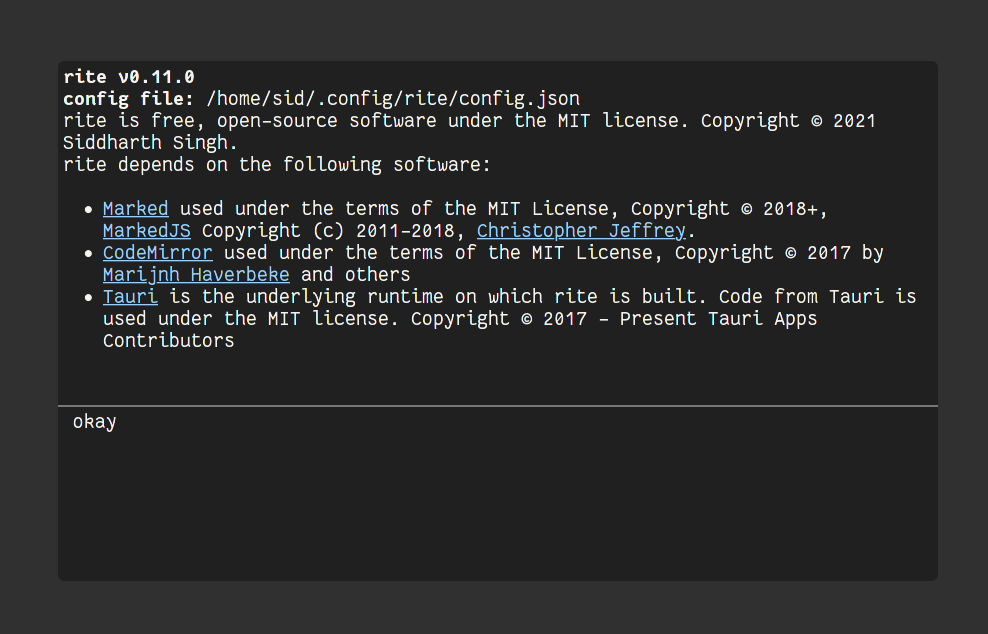
To get started, find out where your config file is. This is displayed in the editor's About menu. Open the about menu from the Command Palette. Copy the config file path from here.
Important Close the editor before continuing to edit the config file. If you don't close it, your changes will be overwritten the next time you close rite or update your settings within the editor.
Open the config file in a text editor. You can use any text editor to do this, though it is highly recommended to use a programmer's text editor like Notepad++ or Visual Studio Code.
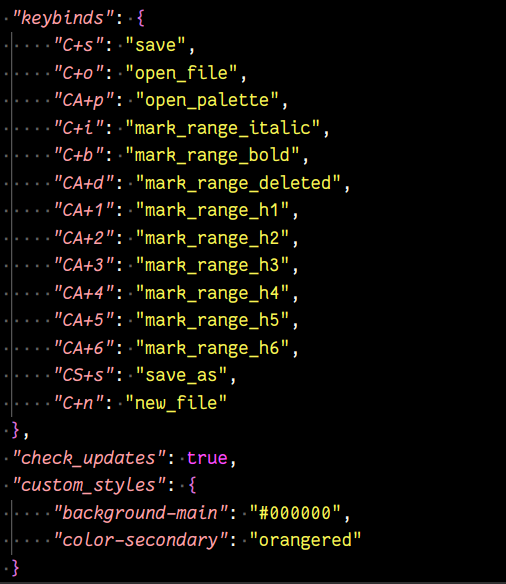
Here, you can edit the keybinds and set custom colors.
Editing keybinds
A keybind is a string consisting of a set of characters, then a +, then a single character more. The first set of characters represents the modifier keys that must be held down to activate the shortcut, and the character after the plus represents what key must be pressed to activate the shortcut.
For example, CSA+n means that you need to hold Ctrl (Cmd on Macs),
Shift, Alt (Option on Macs)
and then press the n key.
Now, to change a shortcut, simply change the XYZ+k string next to the command
you want to change the shortcut of.
Editing colors
To add custom colors to rite, add a new key to the JSON file. Put a comma after whatever the last value is,
and then type "custom_styles": {}.
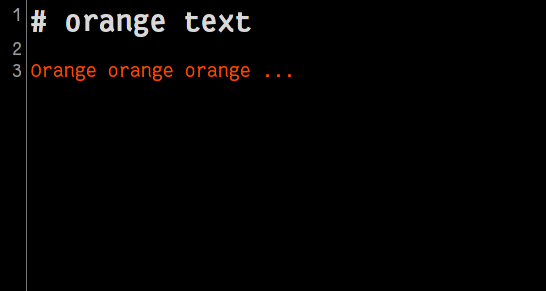
You can set none, some, or all of the following values. All CSS color values are allowed.
background-uiThe background color of UI dialogs.ui-elem-bgThe background color of certain UI elements.ui-elem-fgThe foreground color of certain UI elements.background-rootThe background color of the root pane.background-mainThe main background color of the editable area.color-auxiliaryColor of auxilliary information.color-primaryPrimary text color.color-secondarySecondary text color. Also the text color of normal editor text.color-selectionColor of selection backgrounds. Should be a translucent color.color-md-headingColor of markdown headings.color-md-linkColor of links.color-md-urlColor of link URLs.color-md-bulletColor of text in bullet points.color-md-quoteColor of markdown quotes.color-cm-htmlColor of HTML tags.color-md-stringColor of stringscolor-cm-keywordColor of keywords in code blockscolor-cm-metaColor of language metadata, etc in code blockscolor-cm-bracketBracket color in code blockscolor-cm-builtinColor of language builtins in code blockscolor-cm-typeColor of types in code blockscolor-cm-atomColor of constants such astrue,false,null, etc
Once you're done, it should look something like this:
If you want to check that you've edited the file correctly, run it through an online JSON validator like this one. It should report no errors.
Save your changes and close your editor, then reopen Rite. It should be using your changed settings!
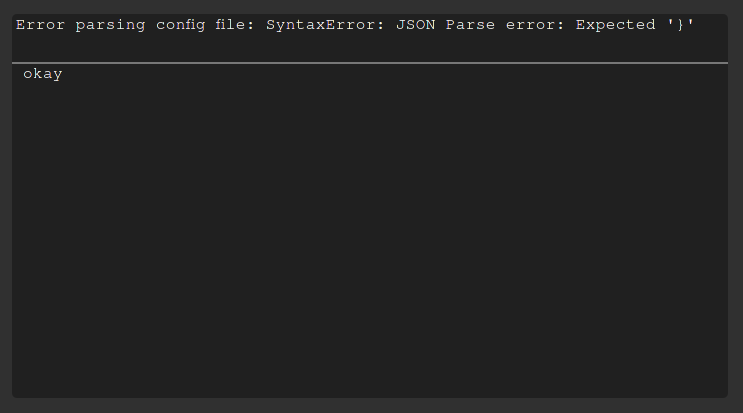
If you made a mistake and the config is invalid, you'll see a dialog like the following. Use a JSON
validator tool to figure out what went wrong, and change it. If you're unable to figure it out,
don't worry - just delete the config.json file (or move it out of the folder it's in) and
Rite will make a new one for you.
Rite Cloud
Rite's sister application is a powerful backup solution called Rite Cloud. To use Rite Cloud, you'll need a GitHub account. With Rite Cloud, you can save and load documents to and from the cloud without ever leaving your editor.
Initial setup
- Head over to the rite cloud homepage.
- Sign in with GitHub.
- You'll be met with the rite homepage.
- To connect your Rite editor to the cloud, head over to the "link a client" section.
-
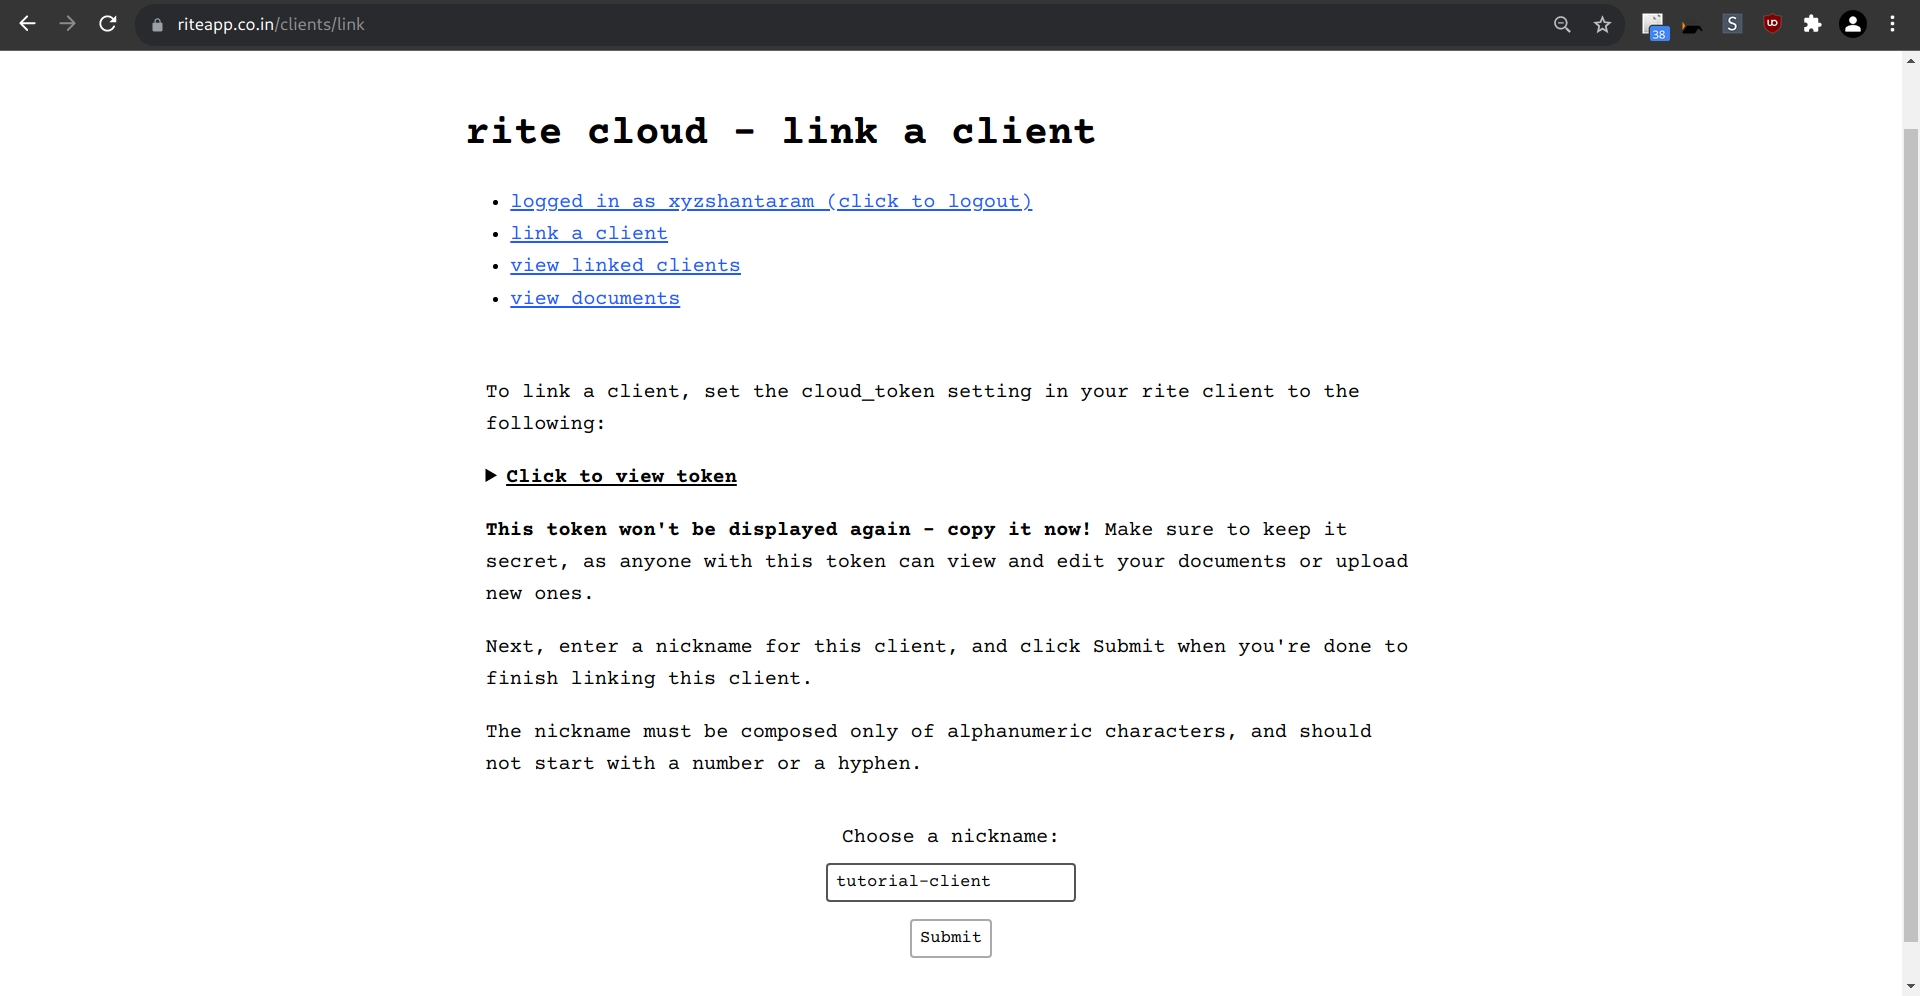
Click the spoiler to view your token. Copy it now — it won't be displayed again! This token is like a password - anyone who has it can upload documents on your behalf and view your private files. Don't share it with anyone!
Open the settings menu of your editor and enter your token into the "Rite Cloud token" field. Set the Rite Cloud URL to
https://riteapp.co.inand the username field to your GitHub username. Make sure there's no slash at the end of the URL.- Wrong
https://riteapp.co.in/ - Right
https://riteapp.co.in
You can now save and load files to and from the cloud. If you feel your token for a client has been compromised, you can delete that client at any time by going to the "view linked clients" section of the web app.
- Wrong
Documents in Rite Cloud
Rite organises files into documents and revisions. A revision is a specific point in the history of a file. A document is a collection of revisions.
Uploading a document
- Select the
cloud_saveoption in the Rite command palette. -
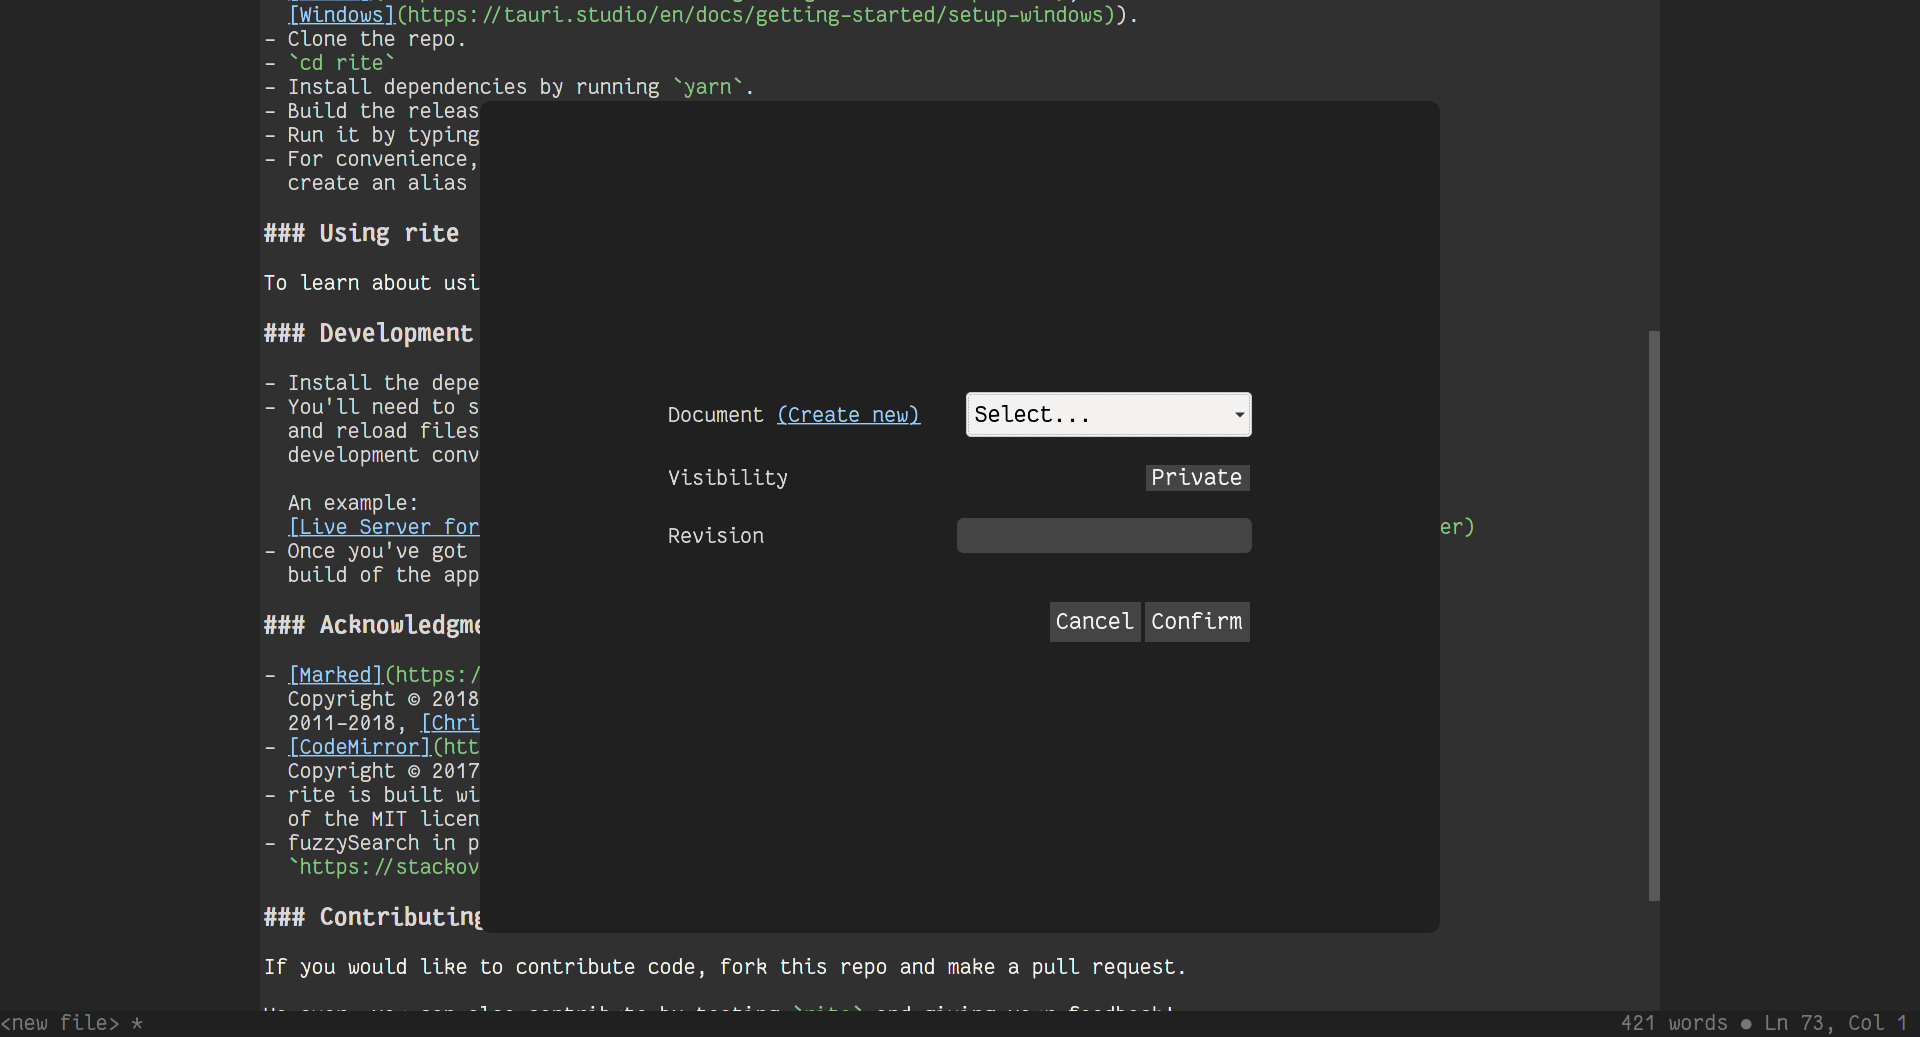
Click 'Create new' to create a new document. Pick a name for the document, then choose a name for the revision. Version numbers, date-time pairs, or distinct names are all good options.
You can also enter a password to encrypt the document with. You will be prompted for the password every time you (or someone else) visits the preview link, and also when you import the document from rite cloud.
- Choose the visibility of the document. Private documents can only be viewed by the owner (i.e. you), while they are logged in. Public documents can be viewed by anyone who has the link. You can change this later, so don't sweat it too much.
- Click Confirm to finish uploading your document.
Document operations
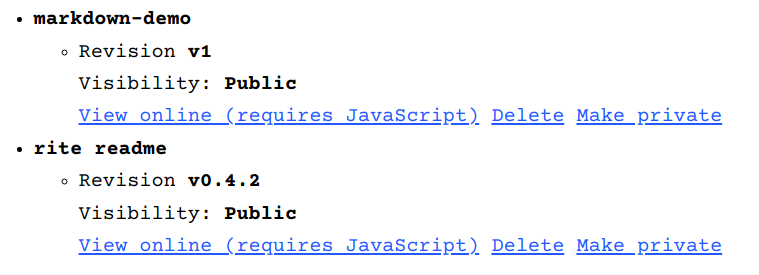
Head to the "view documents" section of rite cloud to change the visibility of documents, get links to view documents, or delete documents. If a document has more than one revision, an option to delete all revisions is displayed.
Viewing documents
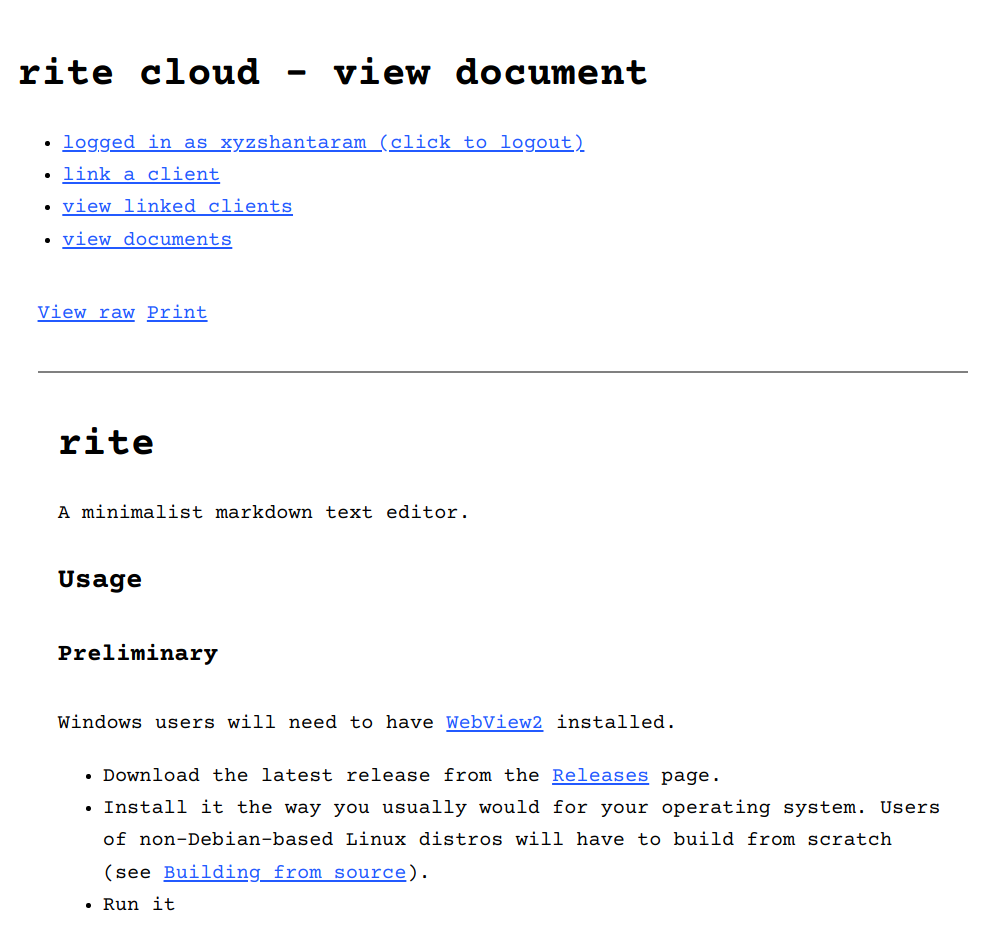
While viewing a document, you can click the "View raw" link to view its raw markdown code. You can also click "Print" to view a version of the page without any UI elements, for use as a pdf or for printing out.
Loading documents into the editor
You can load a document stored in Rite Cloud into any editor instance with a valid token for your account.
-
Ensure that the document you are working on is saved. Then, open the command palette and select
cloud_open. -
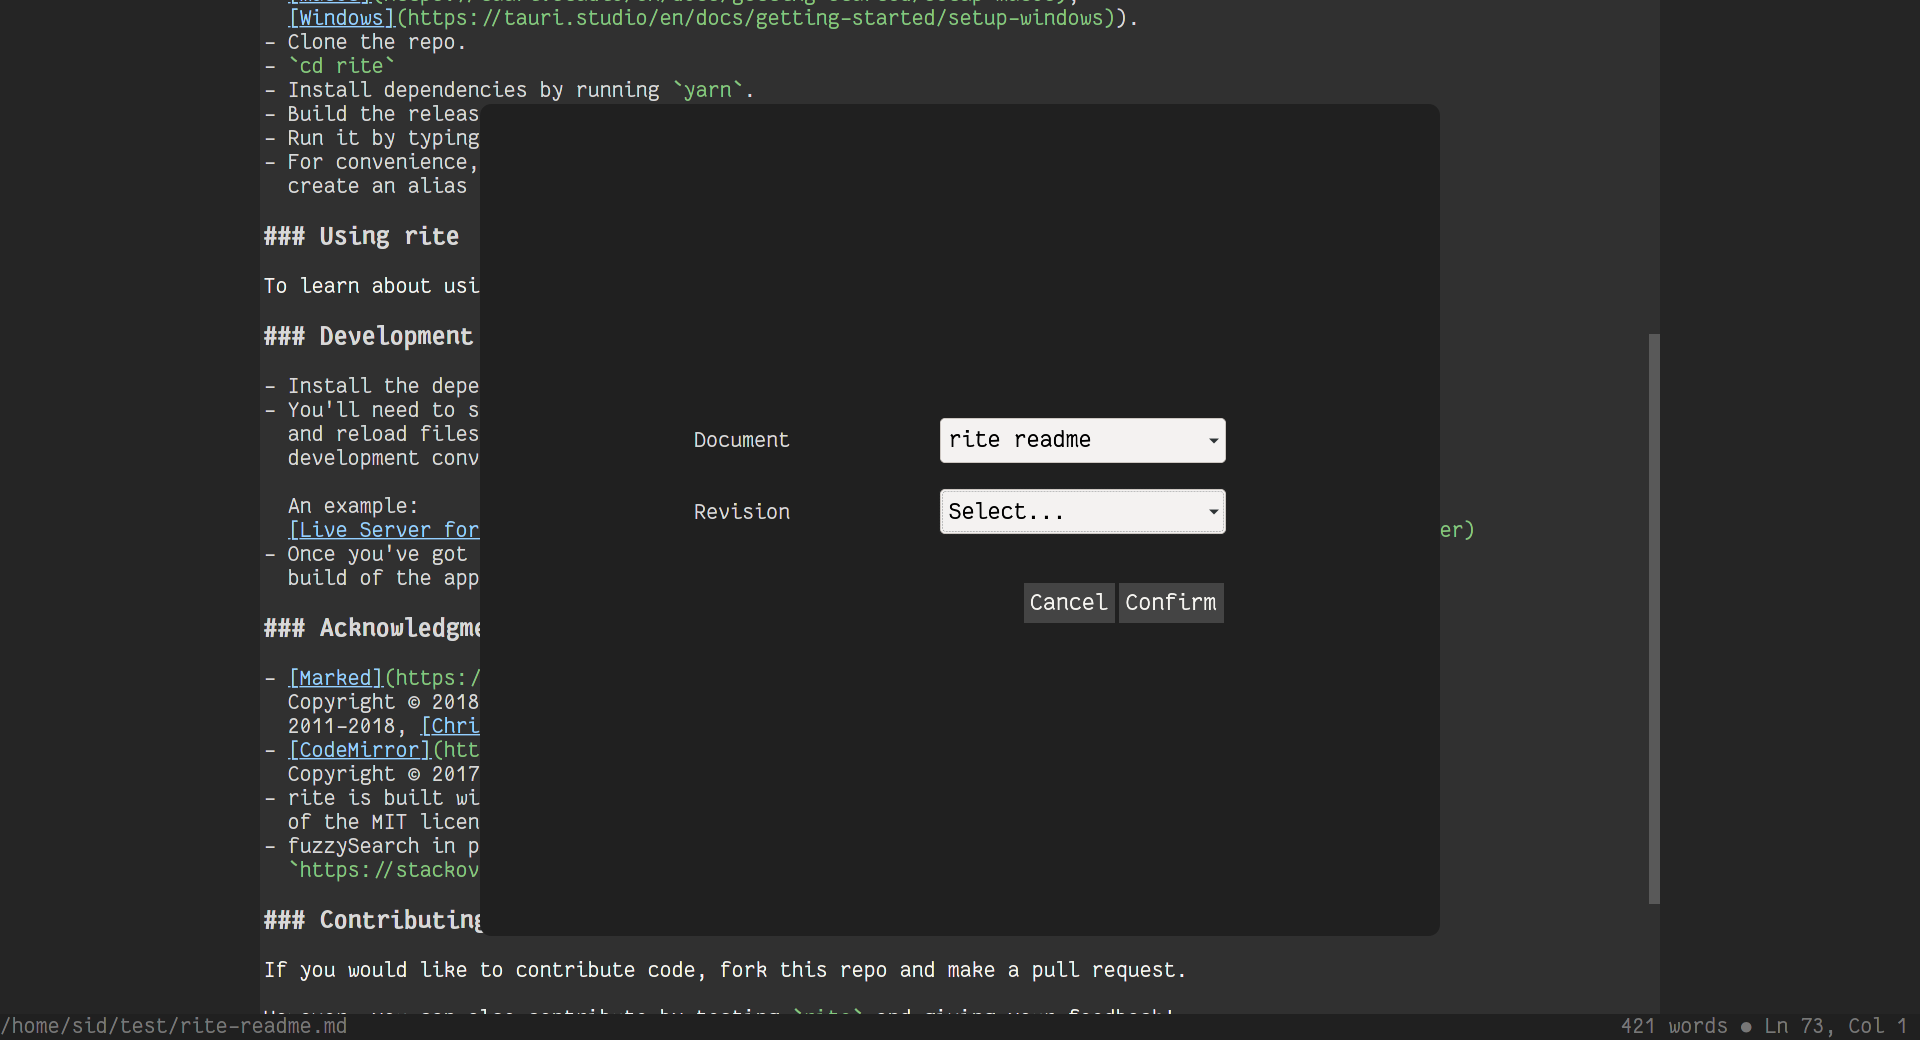
- Select the document you want to open, and the Revision dropdown will be populated with a list of all the revisions of that document. Click Confirm, and the contents of the document you selected will be placed in the editor window for you to work on.
What now?
Now that you've written your Markdown document, there's a number of things you can do with it.
Turn it into a website
- If you've set up Rite Cloud, you already have a GitHub account, and you can use it to make a free website using GitHub Pages and Jekyll.
-
You can use Rite Cloud's preview feature,
GitHub Gists,
or Rentry to make a single-page website that you can
share anywhere you like.
New! You can create a blog using Rite's new blog feature.
- You can use a static site generator like Hugo to create a website with Markdown files.
Writing a book?
- You can use Pandoc to turn your markdown document into an ePub.
-
Add a table of contents with the
toccommand. Great for papers and novels!
Export your work
- For documents with only text and images, Rite's inbuilt preview feature can be used to export them — just click Print to get your document as a PDF or print it out on paper. To use the preview feature, simply open the Command Palette and select "Preview".
- If you need to write formulae, you can use a Markdown-to-HTML tool that supports math markup (such as Cyblog) to turn your work into an HTML document, then print it out from a browser to get an easy-to-share PDF!
Thank you!
You're now ready to use Rite. Thank you for reading this far, and thank you for choosing Rite.
Remember that you can view this guide at anytime by navigating to
https://riteapp.co.in/help, or opening the
Command Palette of your editor and selecting the "Help" option.